

New dress and new video!
If you don’t have time/sound for a video right now, here’s the transcript!
Good morning sewing folks! I was in the mood to make a cute little modern-day dress, so in a fit of contradictory pattern buying shenanigans, I ended up getting Butterick vintage 50’s pattern 6018. It’s a cute little day dress with sleeves and a fold back lapel on option a or a sweet heart-shaped neckline for option b.

Inside the pattern envelope we have the pattern pieces on the super thin tissue paper. Rather than cut out these pieces, I am going to instead trace them out on to some brown butcher paper. The benefit here is I won’t lose the multiple size options, I’m less likely to lose pieces, and I will have a sturdier pattern to use while I trace and cut out my fabric. When tracing, be careful to not only trace the outline, but also all the little marks that you will need later to correctly match up your pattern pieces to each other and the information on the pattern that tells you how many pieces to cut out and grainline and such.

My pattern pieces are all marked and cut out and the original thin pattern has been refolded and returned to the envelope. I’m making a hopefully wearable mock-up out of this red and green plaid cotton fabric. The fabric is perhaps a little thin, but this is just a mock-up, so that’s fine. As I finish each piece I like to fold inside or pin it to the paper so I don’t get confused by similar-looking pattern pieces.

My main dress fabric is done, so I’m cutting out the contrasting cuff and lapel fabric from this white cotton. I recommend that if you choose a light collar lining like I have, you should go for a very opaque fabric, mine ended up being a little too sheer. All of the pattern pieces you see here will also be interfaced with fusible interfacing. I didn’t film that step, so just imagine me doing what you see here twice.

The bodice front and back piece both have darts, so I am marking them with pins and then sewing the darts before moving on to bodice assembly. The two front pieces get joined now at the center front seam, taking care not to sew past the point indicated on the pattern piece. I recommend ironing the darts after sewing to smooth out the points. As per my instruction sheet, I have pinned the contrast collar facing into place and then I am going to sew it and then I’m going to flip it right side out, taking care to poke out the pointy lapel corners. Some hand-stitching will keep the facing down so it doesn’t pop up every time I put the dress on.

Time for the sleeve cuffs! See the shiny part here? That is the fusible interfacing, and it will help keep the cuff stiff. Unfortunately it is kind of rubbery and therefore really does not want to easily slide through the machine so I am using the paper interface backing to help the rubbery interfacing easily slide through the feed dogs and presser foot. After sewing the perforated paper is very easy to rip away.

Once the Cuffs are assembled, they are sewn to the bottom of the sleeves on one side, and then the raw edges are all tucked into the cuff, and the remaining cuff seam is hand sewn into place. Completed cuffs!


The sleeves are finished and ready to be carefully pinned then sewn into the armscye of the bodice. Unfortunately, I managed to get part of the sleeve stuck into the seam while I was sewing, so I had to unpick this and then try again. Sometimes it seems like no project is properly complete until you’ve had to pick apart and resew some part of it!

The bodice is done enough to try on and it is looking pretty darn cute! The side is open where I will sew in a zipper later, and it might need to be taken in a little bit at the under bust. The collar is huge but cute, and the Cuffs are a fun little detail in this pattern.

Time for the second half of the dress, the skirt! Nothing terribly tricky or exciting here, other than I needed to make sure I remembered which side to leave open for the zipper. The assembled skirt is attached to the bodice, and then we’re back to the try it on step!

I’m pretty sure it’s too big, and I am starting to not love the collar, it feels too big and Jetsons-y. Let’s finish the zipper before making any changes though.

Look at this completely normal side seam, definitely nothing weird here…. oh wait, it’s a zipper! *TA-DA!* I don’t sew invisible zippers very often, so it’s very exciting, almost magical when I do!

The skirt was way too long, so I cut 6 inches off the hem all the way around, and now I am sewing the hem with a quick machine top stitch. Sewing a hem this way is quick and easy, but can lead to unsightly wrinkles in the hem, especially after it is washed. For the actual final dress, I would want to pin the hem in carefully before sewing.

The dress is technically done, but having tried it on with zipper I still think it needs to be taken in a little bit, so I’m going to pick apart the waist seam then in the three front seams I will take out a little over half an inch in each seam. I could have taken out a little more but I didn’t want to go overboard. Yet again I have messed up and sewn a little bit of fabric that I shouldn’t have. Gotta unpick it and sew it up again correctly.

Looking much better now! Although tightening the front has revealed that the torso is a little too long in the back, causing the wrinkle in the waist that you see here.

I bought some little white buttons for the front of the bodice, they are completely non-functional, but pretty darn cute!

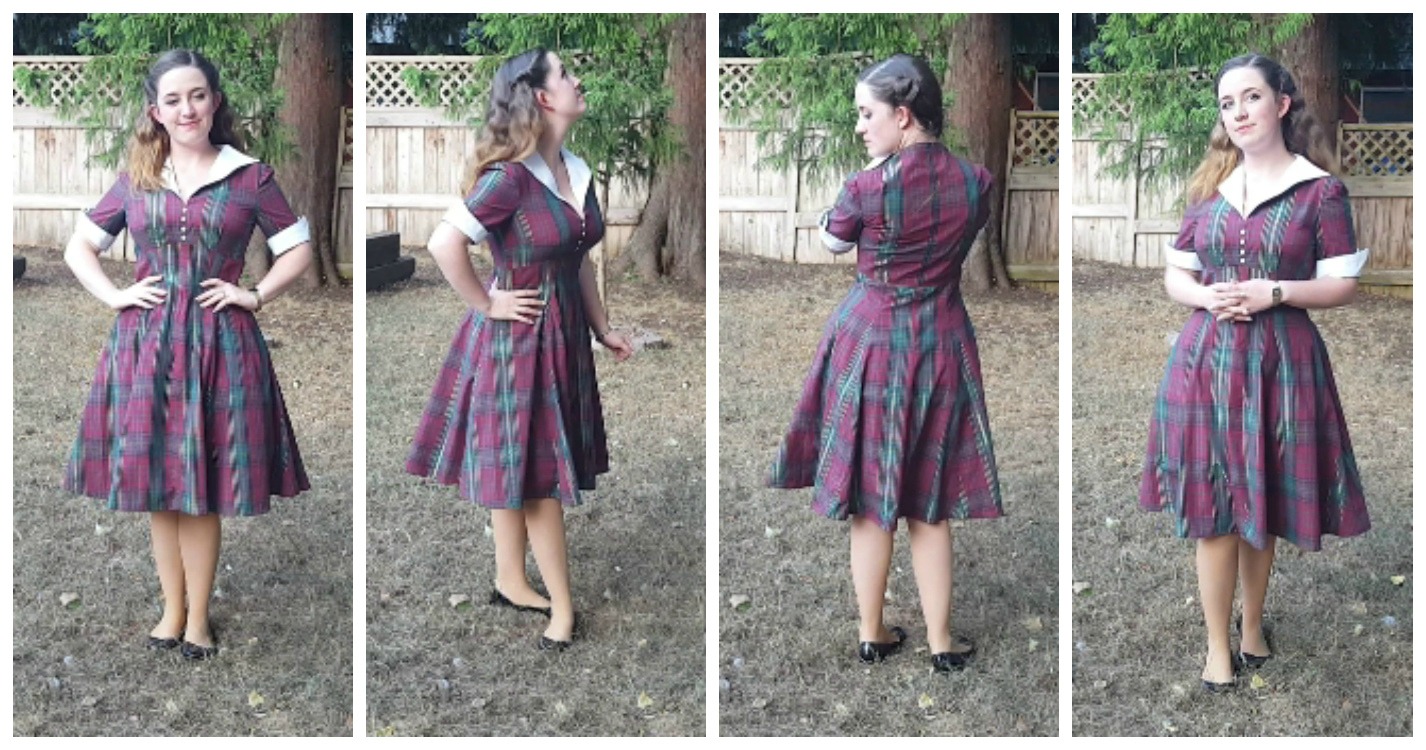
For what is essentially a mock-up, I ended up with a fairly wearable dress! I don’t know that I would have purchased a maroon plaid dress , but now that I have it I think it will make a nice Christmas party dress!

Hopefully that was helpful for those of you thinking about making your own dresses from a store-bought pattern! It takes some time, and you might make some mistakes, but it can be a lot of fun learning to make clothes for yourself! Until next time, goodnight everybody!


