I hope folks don’t mind this break from my usual historical clothing! I don’t make very many modern dresses. I think that this is because if I want a cute dress for daily life, I can buy it for far less effort and money than it would take for me to create the same dress myself. Occasionally I make exception if I can’t find the particular cute dress I need. Last Halloween, I needed a special dress that I couldn’t find anywhere!
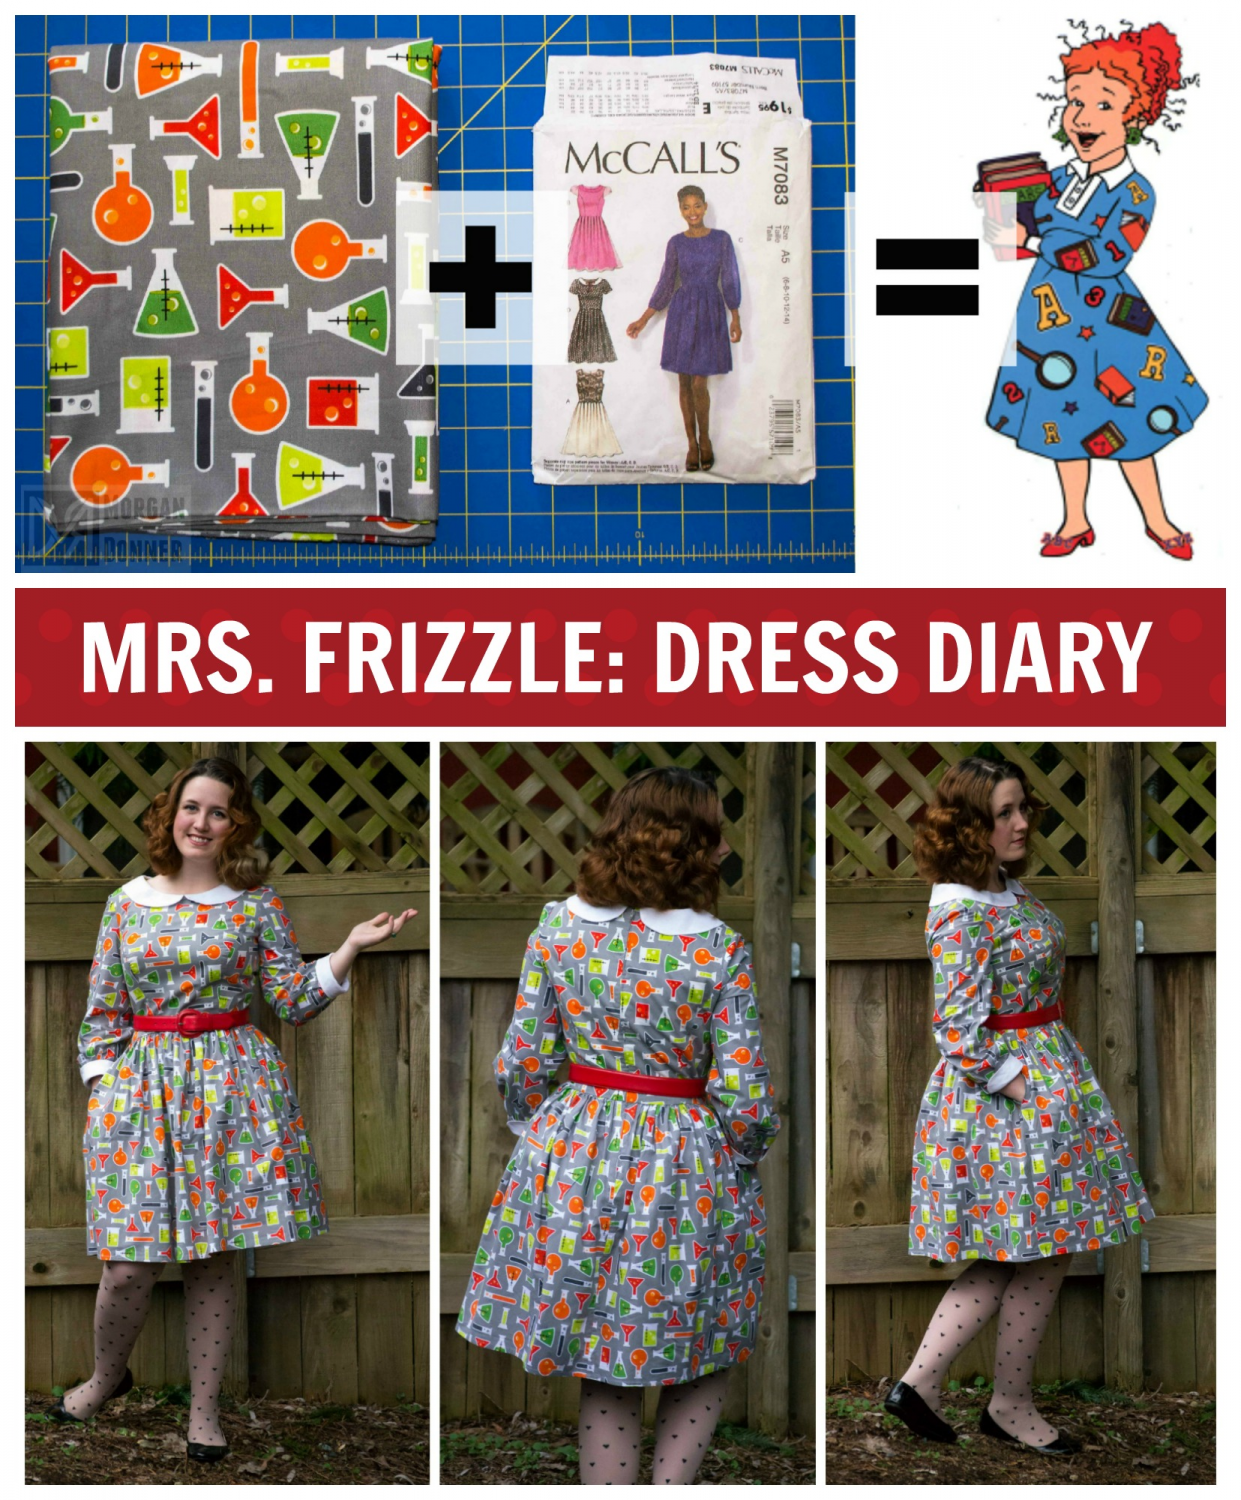
If you are not familiar with The Magic School Bus, it is a fun educational show from the 90’s. The main character is a teacher with fantastic dresses that fit the theme of whatever she is teaching that episode. I needed to make a dress like hers for a TV show themed Halloween party.

I particularly like the ‘objects strewn randomly about’ quality some of her dresses have. I went to a few local fabric stores, and the closest I could find was this beaker fabric below.

I have not used very many commercial patterns, so this seemed like a fun opportunity to brush up on my instruction following skills! This McCalls pattern, M7083, is just about perfect for Mrs. Frizzle. I took pictures through out the process to help me remember what I did, and to show you guys! This post is mostly for people who have never tried following a sewing pattern before, because I know I was a bit iffy about the whole process before I tried it.
So for you new to patterns people, pick up your pattern, make sure you have enough fabric and other notions as per the chart on the back.

- Cut out the pattern pieces you need according to the version of the garment you are making. This one came with multiple sleeve and neckline options, so I picked the peter pan collar and the long sleeves.
- Trace out your pattern. Pencil works nicely on a fabric like this.
- I like to cut out all the necessary pieces at once, and I keep the paper pattern pinned to the fabric so I don’t get confused about which piece it is later.
- I try to not stop cutting the pieces out until they have all reached this point: cut and pinned to their pieces. This is a good spot to take a break if needed.

- I used a contrasting white linen for the peter pan collar. The instructions had it so you cut it out, sewed with a seam allowance of 5/8ths of an inch, and then trimmed the excess seam allowance away before flipping.
- This might seem silly (it did to me when I was first learning to sew) but the bigger seam allowance is far easier to sew than the eventual 1/4 inch, and you can’t just leave the big seam allowance on there because it will bunch up and wrinkle inside when you flip the collar. Sometimes silly processes have their reasons.

Looks like I got lazy and stopped numbering the photos! This is 7 and 8.
- Sew the bodice pieces together, for both the lining and outer fashion fabric. In my case, it’s the same fabric for both, since the fabric was light enough to use twice. Ironing your seams is important. Dooooo iiiiit….
- Try on your outfit throughout the process, especially if using a pattern for the first time.

Photo 9: Collar!
- Sew the collar into the neckline with a narrow seam allowance. When I have more than two components being sewn in one area, I like to sew each part on individually, rather than try to pin and sew everything at once. I have found that I mess up less this way. That’s why there are two lines of stitching around the neck seam in the photos below.

Photos 10 – 13.
- Sew your lining to your collared bodice. Essentially, sew the exact same seam you just did, but with a slightly bigger seam allowance.
- Cut out that excess!
- Notch those concave curves!
- Marvel at your collared goodness!

14-17.
- This pattern calls for something I had never done or heard of before: Understitching. All you do is stitch an extra line through the lining and seam allowances.
- This forces the visible fabric to curve a tiny bit toward the inside, which means you won’t have that little sliver of lining fabric peaking behind your collar! So neat!
- Try on your bodice, while it is still easy to alter if something isn’t fitting right. Patterns are rarely perfect, and might need some adjusting to fit your body nicely.
- The armscye is stay stitched in preparation for the sleeves.

18-21. Sleeves!
- I differed slightly from the instructions here. They said to sew the arm length seam and then leave it be, but I am a fan of finished edges where possible. I decided to French seam them instead. First sew the sleeve together wrong side to wrong side with a narrow seam allowance. Then iron it down flat and cut off any long frayed threads on the cut edge.
- Sew the same seam again but with the right sides of the fabric together, and at a slightly bigger seam allowance. The raw fabric edge is now completely encased in the seam! I love how neat and tidy French Seams are.
- As per the instructions, I sewed two basting stitches close to the edge and pulled on one side of the threads to gather the sleeve cap.
- Do the same thing to the hem of your sleeves.

22-25. Cuff time!
- Here’s another area where I slightly differed from the instructions. I wanted white cuffs to match the collar, so I made a pair using the same method as the peter pan collar.
- These patterned cuff pieces are the actual pattern, I didn’t make them up. Ironing the seams at every stage is still recommended. The cuffs were folded in half after this picture so the seam was encased in the folded cuff.
- These are two sleeves. First on the left, I pin two sides, so I know it will gather evenly. On a bigger thing, I might have done four pins at the cardinal points, but two is fine here. On the right sleeve, I have pulled the gathering stitches until they are the same circumference as the cuff (I also flipped the cuff so it is on the outside instead of inside, sorry if that looks confusing!). Stick a billion pins in the seam to keep your parts from moving about and sew the sleeves to the cuffs.
- Your grey cuffs were still folded in half this whole time, so now if I try to pull the cuff down, I have a neat folded edge that I can encase the gathered sleeve into.

26 and 27.
- The cuff binding is stitched down in place, effectively acting as a bias binding, but the pattern calls it a cuff so I have been going with that for you guys.
- For fun: Left is the sleeve as per pattern instructions, and right is with the white cuff I added to match Mrs. Frizzle a little better.

- Yay, time to try on the sleeve! Everything seems to be in order, so we can attach it to the bodice.

29-30, sewing the sleeve on.
- The sleeves are evenly pinned around the armscye before sewing.
- The instructions call for one line of stitching to attach the sleeve to bodice, and a second zig-zag stitch to keep the edges from fraying. This is not the neatest technique but it works.

31, fitting!
- I HAVE A TOP! As always, try on the top to make sure things are still fitting nicely. Seriously, it sucks to get to the very end of a project and realize that something has gone terribly wrong with your sizing.

32 and 33, Pocket Time.
- Yet another departure from the instructions: I added pockets. Pockets are the best, they hold all my things, and I love to add them when possible. The pattern is one I made up, I used my hand with with my fingers spread out to get the size. Pockets are mostly all the same. Sew one pocket piece to each skirt piece.
- Sew the pocket and skirt side seam in the same step.

34-36
- You can sort of see my little black arrows marking where I sewed the skirt seam a bit further in than the pocket seam. Open to the right side of the fabric and iron everything nice and flat.
- Now you see the pocket seam…
- And now you don’t!

37-40.
- Gather the top of the skirt, same method as the sleeve cuff. Some times I will go over the gathered section again to get the gathers to stay in very well.
- Sew it to the bottom of the bodice, but only on the fashion layer, leave the lining free. Use lots of pins!
- Hem the skirt when convenient. I made my hem fairly small since the skirt was a smidge shorter than I had been hoping for.
- Iron things down and glee at your pretty gathered skirt.

41-42
- Attach the zipper! There are lots of great tutorials on zipper installment, so I have glazed over that. The great thing about the internet these days is that if you get stuck on any part of any project, just go look up instructions for that part! There’s a very good chance that someone has written a tutorial for just that thing.
- Hand sew the lining down all around the zipper and waist seam. That will cover all the raw edges inside.

- Yay zipper! I like to try and hide the zipper if possible, although I see I didn’t pay enough attention to matching the waist seam when I sewed the zip in. Woops!

- The dress is now pretty much finished. Just some last touches to complete, like snipping all the threads that you missed as you went along. I tend to not snip as I sew.

- As you snip, you get the chance to really go over your project and see if there are any messy bits that you didn’t notice before. This sliver of fabric sewn in the seam isn’t going to really hurt anything if I left it there, but I might as well fix it now that I have seen it. Seam ripper time!

Lastly, try on your new dress and take pictures! You made a thing!
I waffled back and forth on weather I wanted to add the square button-up placket, but decided not to in the interest of time. I think the torso ended up ever so slightly big, but it will look fine with a belt.
 For Halloween, I added beaker decorations to my shoes, earrings and hair like Mrs. Frizzle does! I also had my hair freshly dyed. It was already red, but I went extra orange for this outfit :D I used the straw method for the curls, which worked ok, but not amazingly well. I probably should have let it dry longer!

Super pleased that the back zipper is nearly invisible! Wooo!
 I have worn this a few times since Halloween, and it is cute, if a bit quirky. I would not mind trying this dress pattern again, although I think I’d go for a lower neckline next time. There are always improvements to be made!

Bonus puppy pictures!